I just wanted to let you know that J**** (the boy I hit with my car) is fine and went to school on Monday, full of the story of how he was hit by a car and survived. He only has some minor cuts and scrapes.
My windscreen has been replaced and I take my car in for a quote tomorrow. I'm back driving, but still a little jittery; especially when I drive through the section of road where the accident happened.
As I thought, the story of how a boy from school was hit by a car while jaywalking is all over the school, but only a few actually know I was the "culprit". :)
Anyway, bye for now. I'll be back soon with some more cards.
Love,
Janelle :)

Thursday, October 29, 2015
Saturday, October 24, 2015
OMG! I thought I killed a kid yesterday!
Yesterday was both the worst day of my life as well as the luckiest!
I was driving to pick up my son, Alex, from school, when a Grade 12 student ran out from between a line of stalled traffic - right in front of me! I slammed on my brakes, but wasn't able to stop in time before I hit him with my car. He hit the front passenger side of the car before being bounced up into the windscreen. He then bounced off onto the road in front of me. By this time the car was stopped, so I put it into Park and got out and ran to the boy. He was up on his feet and standing there, holding his head, and said to me, "Am I hurt?"
I remember thinking to myself "Thank God he's not dead", but at the same time I'm thinking, "Of course you're hurt, you bloody idiot, you've just been hit by my car!" But I told him he was hurt and he had to stay still while I phoned the ambulance. He then tried to move away, saying, "No I'm alright. I've got to go." Talk about a "hit and run" incident. (Please don't think I'm being flippant - it's just a reaction to the fact that he didn't appear to be seriously injured and, even now, more than 12 hours later, I feel like crying and still have the shakes.)
Next I know people have come from everywhere to take the boy to safety in one of the shops across from where he was hit, another man came and phoned the police and ambulance for me, another helped me move my car to a safer park, someone else gave me a cup of lovely cold water and found a seat for me to sit in, some girls from the school phoned the school to tell them what had happened, someone else had phoned the boy's mother, one of the girls from the barber shop came out with a wad of toilet paper for me to wipe my tears (because she didn't have any tissues) and then the ambos came and started looking after the boy. I'm blown away by the selfless actions of so many. They were all wonderful.
Next came along the principal and one of the deputies from the boy's school. (Did I mention it is also the school where Alex goes to school and where I taught for many years before I left to have Alex?) The principal asked the deputy if he knew who belonged to the car, and I told him it was mine. His eyes just about popped out of his head. I wonder why he didn't guess just from looking at me, from my red face, swollen eyes and tears streaming down my face?
Anyway, the police came next and were also the most lovely men possible. After getting my statement and talking to the witnesses, they told me that there's nothing that I could have done to prevent the accident and they wouldn't be charging me with anything. The paramedic in charge then came to tell me that they were taking the boy to hospital to be checked out, but as far as they could see he only had minor abrasions and bruising. (I hope they didn't find anything more serious once they did the xrays etc.)
After everyone left and I was left waiting for my husband to come and get me (Mind you, Alex was still at the school waiting for me to pick him up) and I finally went to have a look at the damage to the car (I hadn't paid any attention to it before - I had been more concerned with the damage to the boy), the enormity of the situation finally hit me and I really started crying. Once again some ladies from the hairdressing salon came to my rescue and took me inside, gave me some more water and made me wait with them until Darryl arrived.
I won't go into all of the rigmarole that followed concerning moving the car to a safer place, phoning the insurance company and the windscreen repairer etc. Suffice to say, we went to pick up Alex who had been cared for by the deputy (even to the extent that when we arrived they were on the hunt for something for Alex to snack on!) and then went home.
As I said it was the worst day (I can't stop feeling guilty for hurting someone, even though it was an accident) as well as the luckiest day. Lucky that he wasn't hurt too seriously (he so easily could have died), but also lucky to realise that there are so many lovely people in the world ready and willing to help in times of difficulty, and that they work and live in my area. How lucky is that???
Anyway, bye for now.
All of my love.
Janelle :)
P.S. I thought about showing you a photo of my damaged car, but thought it was just a little gratuitous, but also luckily for me, there's really not that much damage to see. Just the smashed windscreen and some damage to the bonnet.
PPS. This is gratuitous, but I totally freaked out when I found tufts of hair stuck in the smashed windscreen. It still makes me feel sick to think of it.
Monday, September 28, 2015
Inlaid Die-cutting
Over the two weeks or so I've been trying out ideas to do with inlaid die-cutting. I'm working on a commission for Practical Publishing and I've been investigating cutting dies as well as assorted techniques. I'm posting a couple of cards I've made (but these won't be going to print). :)

The first card uses a die from the Couture Creations Floral Lace Collection called "Bold Bouquet". I applied tape over the back of the areas where the very small flower pieces were and left them gold. It would have been too tiresome to replace all of those pieces. As it was, the replacement of a lot of the pieces was as frustrating and difficult as hunting for nits. Some of the pieces were so small that I couldn't even pick them up with a pair of tweezers. Thanks for my QuickStik. :) The sentiment is from a Stampers Anonymous/Tim Holtz set called Crazy Talk.

I'm pleased with how it turned out, but it is certainly a die for the stout-at-heart with plenty of patience. An easier way of achieving this same look is to cut it out of white cardstock, keep all of the pieces in place and then just colour the pieces as wanted - like a Faux-inlaid die-cutting.

The second card uses a couple of dies; the "Balloons" from Couture Creations Kalini Collection; and the other, the "Birthday Girl Die" from Echo Park Paper. The die cut background also uses a set from Lawn Fawn called "Puffy Cloud Borders".
I made the background pinkish because you can't really have a blue background for a girlie card, can you? The ombre effect, hopefully, looks like a sunset sky. Sitting here, looking at the card on screen, I've just realised that I've made a mistake on one of the balloons. Can you spot it? I will be using these dies in my commission, but not exactly how I've used them here. I'll have to remember to fix up that booboo. :)
Anyway, gotta go. Bye for now.
Love,
Janelle
Saturday, September 26, 2015
Daydream Dreams
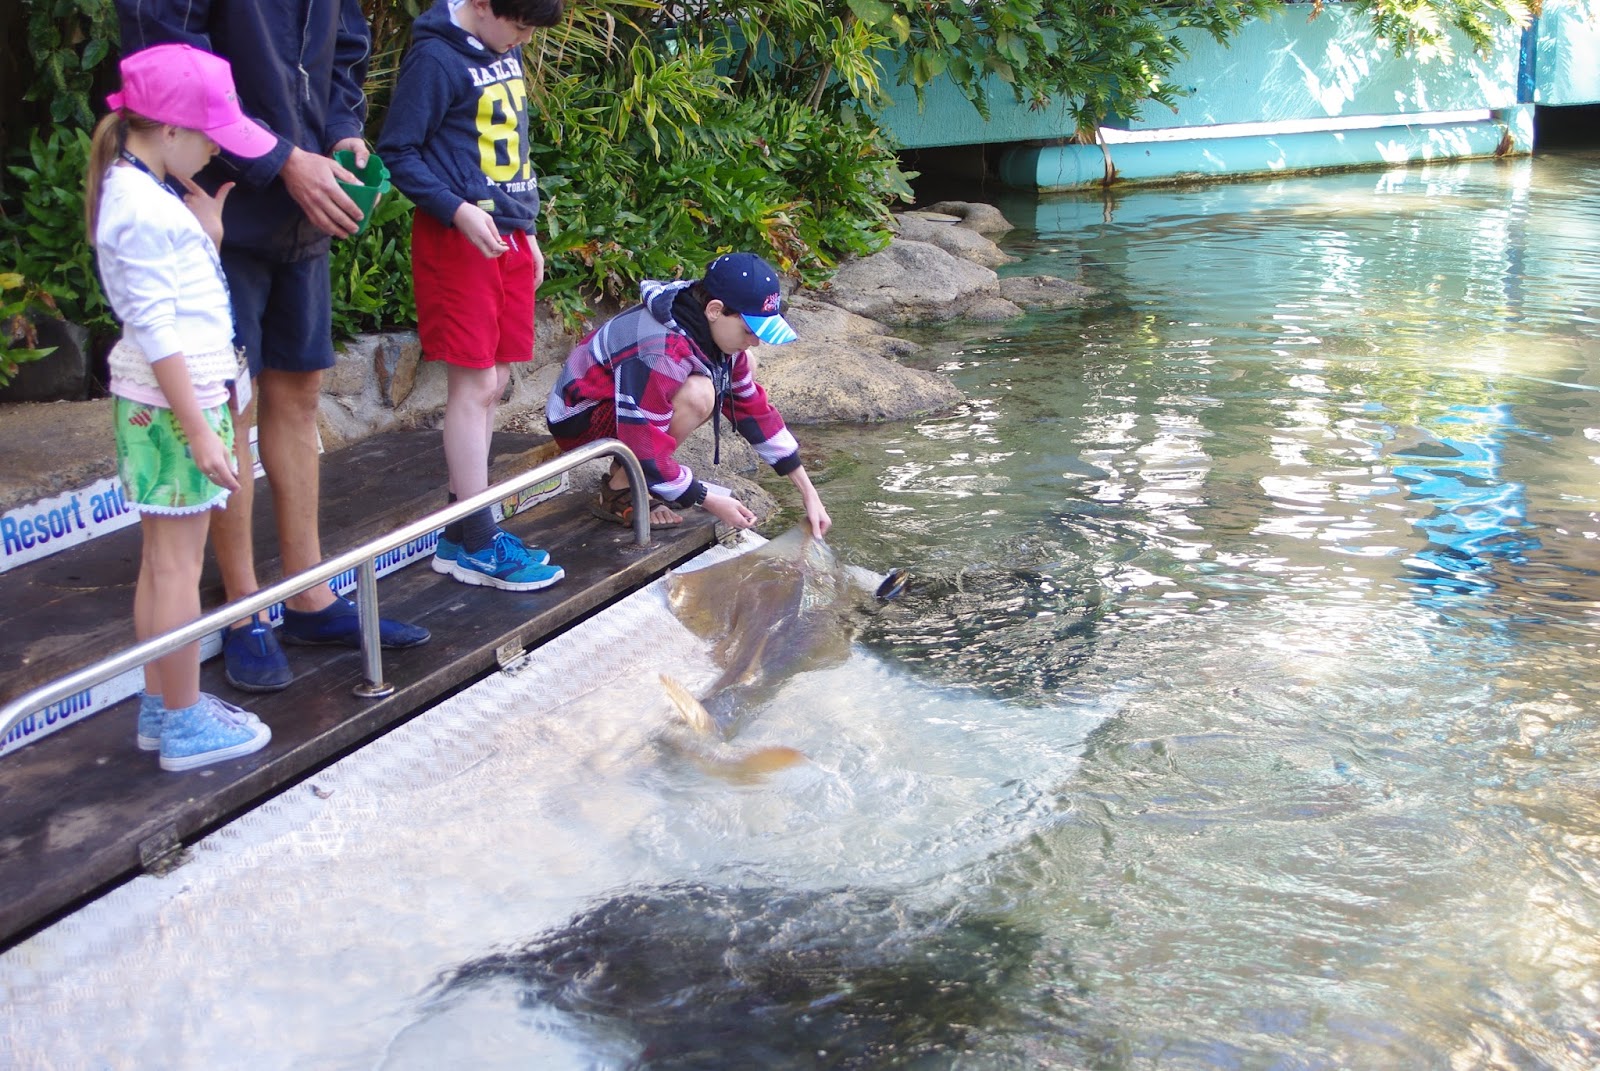
Just a quick post to show you some of the photos I took recently when my family went up to Daydream Island (on the Great Barrier Reef, Australia) for a wedding. It was only a long weekend (Thursday to Sunday), but we had so much fun, especially my son when he got to feed and play with stringrays and other marine creatures as part of a program they run. You should have seen him while he was helping present the Living Reef Show. He was a real ham!


My husband, Darryl, my son, Alex and me

This is a Proserpine Wallaby - a native marsupial to the island. It's not white in colour (though a light brown) just in full sunlight.

This is Daydream Island taken from the ferry going back to Hamilton Island from where we were flying home.
What's so amazing about this region is that there are hundreds of very small islands all scattered throughout this one passage of water. In fact, if you didn't know better, you could easily think you were on an island in the middle of a huge lake, as from all viewpoints around the island, you can see land in the distance across the water, but it's just a lot of islands that sort of line up together so it looks like one huge landmass. If you wanted to, you could paddle from one island to the next quite easily. The landmass you see in the background of this last photo, though, is the mainland.
Loved the colours of the water and the coral (the water was so clear, in parts, I could see it under the water). On the way back home, I was envisaging a series of cards using the marine colours I saw (esp, that blue!) unfortunately life got in the way and I haven't done them yet.
Hope you enjoyed my snapshots of Australia.
Bye for now.
Love,
Janelle
Monday, September 14, 2015
My Box of Inspiration
As part of my rehabilitation of my creative juices, I watched a video from Sandy Allnock where she talks about the creative process. I especially liked a quote by Picasso (originally heard from Kristina Werner), that she spoke about,

At the time it really resonated with me, so I made a tool box and festooned it with that quote.

I used a Kaisercraft chipboard BTP Scrapping Organiser that I covered with patterned papers from the Base Coat Collection. I painted the edges and drawer front with some Airondack Copper paint. After applying the quote using some old basic grey micro mono stickers, I painted over the quote with some multi-medium matt gel to seal the letters in place. To complete it, I added some strips of Papermania's Madame Payaud's patterned craft tape across the drawer.
Not only have I now got something to contain all of my craft stuff that I can carry around the house with me; but I have something to keep me going when I'm not feeling so inspired. This is really so great as I've been trying to contain all of the stuff I regularly use. There's a section for my embossing and stamping stuff, a section for glues, etc; a section for tools, pens, etc; and at the back there's a deeper section for scissors, ruler, heat gun and rolls of adhesive strip. The drawer is going to be for the ink pads that I regularly use as well as blending sponges etc. You should see my craft bench now! :)
Thanks to Sandy Allnock for your inspiring words. I can't fully express what they really meant to me at the time.
Anyway, bye for now.
Love,
Janelle
Giant Distress Label Cards
I'm posting some more cards from the Brisbane Craft Expo in June this year.

This lot of cards were also from a class run by Rachel Greig from Darkroom Door. These cards used huge black tags and then for the backgrounds I used a variety of techniques, including using Distress Sprays, stamping with a wet stamp pad to create a resist appearance, and smooshing with distress sprays on a craft mat.
Photo stamps were then used to add interest. The "Happy Birthday" card was just too dark in colour for the stamp to show up, so I used one of Rachel's photo chips on top instead. The ribbon was coloured to match each background.


The black tags were stamped with Picket Fence Distress Spray and then spritzed with metallic Distress Spray.


I had so much fun making these cards and totally ended up with multi-coloured fingers for the next couple of days. :)
Anyway, bye for now.
Love,
Janelle
Wednesday, September 9, 2015
Well I'll be......

I never thought that my card making theory/skills would ever come in handy with my cooking, but for a recent Grandparents Day at my son's school, we had to take along a plate of food suitable for a morning tea. I made my favourite Chicken and Asparagus Rolls. (recipe below)
I was packing them up ready to go but they didn't look attractively presented. "Ah ha! Chevrons!" I said to myself, quickly changing the arrangement. I think they look quite attractively presented, because of the parallelogram shape of the rolls, the chevron placement just adds some interest. They must have been good anyway, because they all went in about the first 10 minutes. :)
Here's the recipe. (I'm afraid it's in metric - I don't have the imperial equivalents.)
Chicken and Asparagus Rolls
1 large chicken breast
3 teaspoons mayonnaise
2 tablespoons bread crumbs
2 sheets ready rolled puff pastry
340g can asparagus spears
1 egg
salt & pepper for seasoning
2 tablespoons sesame or poppy seeds
- Process chopped chicken with mayonnaise, salt & pepper and breadcrumbs in a food processor until smooth.
- Place mixture into a piping bag. Cut the pastry sheets in half lengthwise, making four long strips.
- Drain juice from canned asparagus spears.
- Pipe chicken mixture along the edge of each strip of pastry. Place the asparagus spears in a single row alongside the chicken.
- Brush pastry with beaten egg. Roll pastry over filling to enclose filling completely. Place on a greased baking sheet with the seam of the pastry facing down onto the tray. Cut rolls diagonally into 3.5cm pieces, brush tops with egg and then sprinkle with sesame or poppy seeds.
- Bake in a hot oven for 10 minutes, reduce heat to moderate; bake a further 10 minutes or until golden brown.
P.S. To make it easier, I just place teaspoonfuls of the chicken mixture onto the pastry instead of piping it out. You can still achieve a tube-like appearance with it. Also, if you don't have a food processor, you can always buy chicken mince instead and then just mix it really well in a bowl.
Makes about 20
I hope you enjoy them.
Bye for now.
Love,
Janelle
Cards from Craft Expo 2015
I'm posting some cards today that I made during the Craft Expo back in June this year. I did a number of classes with the gorgeous, talented and funny Rachel Greig from Darkroom Door. She's been a favourite of mine for a long time and I look forward to learning from her each year.


(Sorry Rachel that it is such a bad photo. But at least we can't see my wrinkles!) :)


The three cards above are from a class I did with Rachel that dealt with painted Backgrounds. We used Dylusion Paints, Dina Wakley Media Paints and Perfect Pearl mists to create multi-layered cards. You may not be able to see it in the photos, but the backgrounds have been sprayed with Perfect Pearls Mists and are just gorgeous in their sheen. The Dylusion Paints are also tremendous with the vibrancy of their colours and the amazing coverage, A little goes a long way and you don;t have to worry about recoating as one layer has plenty of depth to it.
I loved the layering with brayers, stencils, background stamps etc that makes these cards look so amazing.
The card I gave to my husband for our anniversary was also from this class.
I'll be back tomorrow with some more cards from the Expo.
Bye for now,
Love,
Janelle
Tuesday, September 8, 2015
Happy Father's Day
Sunday in Australia was Father's Day and I have to show you the card I made for my dad.


Sorry it's not a good photo at all. The background for the card was a sheet of patterned paper from Kaisercraft Base Coat Collection and looks like pieces of corrugated iron all riveted together. On top of this I added a panel of white CS that I stencilled with some Steel Viva Ferro paste; and then on top of that I added a panel that I stamped and then coloured using my new Zig CLEAN COLOR Real Brush markers. Yeay!!! I used my birthday money this year to buy myself a 24 pack. I haven't used much of them as yet, but will certainly do so in the future. I will admit that my first effort wasn't that great, so I can only hope to improve. :)
Anyway, bye for now.
Love,
Janelle
Back at last!
So many times over the past months, I've made up blog entries in my head, only to have something come up before I was able to get it typed up. From sickness, family issues, computer failure, magazine commissions, lack of inspiration - you name it - I've had it!
I have so much to tell you about, but to start off, I'll tell my Aussie readers about a little shop in Brisbane where you can get your sequins at an amazing price. The shop is called Bead Trimming and Craft Company and is found at Stones Corner. They have a wide range of colours, sizes and shapes of sequins.
About a month ago they had a fire in their upstairs section that housed the Doll and Teddy Bear Hospital, but apparently all is fine and they are back in business.

The selection of sequins you can see in the photo show a few that I picked up when I was there. I bought 2g of each colour and that's probably heaps to last a long time. Check them out.
I also took advantage of the Scrapbook Expo that was in Brisbane (June 6-8). This year I went the entire three days and did heaps of classes (concentrating on cardmaking techniques (of course) but also doing a couple of scrapbooking classes with a girlfriend on the Monday.) Next year, can someone please remind me not to go the whole three days - it almost killed me! I could hardly move on the Tuesday and it took over a week to fully recover from it. My CFS just isn't up to such abuse! :)
It was worth it with some fantastic classes and heaps of ideas. I'll be including some photos of projects I did over the next couple of days, but I'm going to show you this card I made during the Expo. As soon as I saw the stamp used on this card, I just knew I had to give it to my husband for our anniversary this year. It was part of a set I made with Rachel Greig from Darkroom Door and used some of Dina Wakley Media Paints. These are great for multi-layering with stencils, brayering and stamps.
 (The colours aren't quite right - they are much more vibrant IRL.)
Bye for now,
Love
Janelle
I have so much to tell you about, but to start off, I'll tell my Aussie readers about a little shop in Brisbane where you can get your sequins at an amazing price. The shop is called Bead Trimming and Craft Company and is found at Stones Corner. They have a wide range of colours, sizes and shapes of sequins.
About a month ago they had a fire in their upstairs section that housed the Doll and Teddy Bear Hospital, but apparently all is fine and they are back in business.

The selection of sequins you can see in the photo show a few that I picked up when I was there. I bought 2g of each colour and that's probably heaps to last a long time. Check them out.
I also took advantage of the Scrapbook Expo that was in Brisbane (June 6-8). This year I went the entire three days and did heaps of classes (concentrating on cardmaking techniques (of course) but also doing a couple of scrapbooking classes with a girlfriend on the Monday.) Next year, can someone please remind me not to go the whole three days - it almost killed me! I could hardly move on the Tuesday and it took over a week to fully recover from it. My CFS just isn't up to such abuse! :)
It was worth it with some fantastic classes and heaps of ideas. I'll be including some photos of projects I did over the next couple of days, but I'm going to show you this card I made during the Expo. As soon as I saw the stamp used on this card, I just knew I had to give it to my husband for our anniversary this year. It was part of a set I made with Rachel Greig from Darkroom Door and used some of Dina Wakley Media Paints. These are great for multi-layering with stencils, brayering and stamps.

Bye for now,
Love
Janelle
Saturday, March 14, 2015
A Card with Strings Attached and my 100th blog post!
The title of today's blog entry comes from my husband, who on seeing the card said, "Ah! This card comes with strings attached?" ???
These two cards are using some watercoloured backgrounds I made while playing around for a commission I was recently doing.


The first one was just a smooshed colour thing where I smooched colours onto a wet panel of watercolour paper and waited to see what happened. While it wasn't suitable for my commission, I liked the combination of colours, so thought I'd play with the My Favorite Things Weekly Sketch Challenge No. 219.
I basically took all of the elements of this sketch and threw them in a pile. I used the Lawn Fawn Cuts Stitched Hillside Borders dies to cut the slight wave of gold glittered cardstock and also a Lawn Fawn stamp for the sentiment.
I tried to make the card more dynamic by switching the direction of the large strip and having the sentiment strip crossing over the top. To tie it all together, I added some lime green twine. I really like how the twine looks because it almost looks like the My Favorite Things Die-namics LJD Scribbles flower die cut. Almost???! I'd love to get my hands on those die and coordinating stamp sets.
This is the first time I've done a MFT Sketch Challenge. I hope they don't block my site for totally destroying their sketch. :)

My second card is for my dad's birthday in two weeks time. It also uses a watercoloured background that was created with some embossing paste, a stencil and then watercolouring in the blanks. I wiped the paint off the embossed circles so they showed up brightly. Loved this effect, but once again wasn't suitable for the commission I had been working on - this was a little too masculine. The sequins really set off this card design. I'm pleased with how it turned out.
Anyway, bye for now. I'll be back in another couple of days with some more watercoloured backgrounds I have still left over.
Love,
Janelle
P.S. It was only after I had posted this entry that I realised it was my 100th blog post. Wow! I've enjoyed my time over the past 3 years and am looking forward to many more years and posts to come.
Sunday, March 8, 2015
My Poor Mum
A month ago, my Mum tripped while walking along the street in her retirement complex. She face-planted the bitumen and ended up being taken to hospital. This is what I saw when I finally got there (I had to phone a number of hospitals in the area before I found out which one she was in). (It's not a flattering photo, at all!)

She severely bruised her right eye socket and cheek, as well as her chin, left knee and hip. She also cut her lip and broke two teeth. Miraculously, she did not break any bones or require any stitches etc. Considering she is 79 years old, I reckon that's incredible. She stayed in hospital for four days and then came home with me for another four days, as she had a really severe concussion. I'm pleased to say that she's now mostly recovered, except for her teeth (She did have a dentist's appointment that she didn't keep, but that's another story) and her damaged glasses.
The reason I'm sharing this is because I disappear off the blog landscape for long periods of time, and I often feel guilty about not spending more time of my blog and cards (though I did also have two commissions for the magazines during this same time). ~O~ (That's me with my hands in the air, shrugging) But with me, family always comes first.
But I'm able to share this birthday card, today, that I made using a "make and take" from Craft Giraffe a couple of weeks's ago during their Silly Weekend Sale. I made it with help of Tracey Cooley from Couture Creations. (She's such a scream. I'm looking forward to catching up with her again in June at the Papercraft Expo here in Brisbane.) I love the layering we put on the paper (which started off plain white).

Anyway, this card is for my niece who's 11 today, so "Happy Birthday, Sarah!"
I'll be back soon with some cards I've made from practice pieces while I was researching for a series of cards I made using watercoloured backgrounds. Wait and see!
Bye for now.
Love,
Janelle
She severely bruised her right eye socket and cheek, as well as her chin, left knee and hip. She also cut her lip and broke two teeth. Miraculously, she did not break any bones or require any stitches etc. Considering she is 79 years old, I reckon that's incredible. She stayed in hospital for four days and then came home with me for another four days, as she had a really severe concussion. I'm pleased to say that she's now mostly recovered, except for her teeth (She did have a dentist's appointment that she didn't keep, but that's another story) and her damaged glasses.
The reason I'm sharing this is because I disappear off the blog landscape for long periods of time, and I often feel guilty about not spending more time of my blog and cards (though I did also have two commissions for the magazines during this same time). ~O~ (That's me with my hands in the air, shrugging) But with me, family always comes first.
But I'm able to share this birthday card, today, that I made using a "make and take" from Craft Giraffe a couple of weeks's ago during their Silly Weekend Sale. I made it with help of Tracey Cooley from Couture Creations. (She's such a scream. I'm looking forward to catching up with her again in June at the Papercraft Expo here in Brisbane.) I love the layering we put on the paper (which started off plain white).
Anyway, this card is for my niece who's 11 today, so "Happy Birthday, Sarah!"
I'll be back soon with some cards I've made from practice pieces while I was researching for a series of cards I made using watercoloured backgrounds. Wait and see!
Bye for now.
Love,
Janelle
Friday, February 6, 2015
My Red Astra
I always wanted a red Astra car for as long as I've been driving. Even when I bought my first new car, it was a choice between the Astra or the brand new Vectra (which in my opinion was the best car developed - boy, did it handle curves well! Too bad it was more expensive to repair.) Anyway, I digress...... I've been trying to streamline my crafting area (mainly contain it into one room - and when you have as many crafting interests as I have - that can be a big ask. :) I've managed to get my crafting table set up, but I needed a stool to use with it - hence the red Astra!


As you can see it's a lovely red colour, has gas lift and is very comfortable to sit in. For those of you who would like one - you can get them from Super AMart and the model name is ...Astra. I've finally found what I've been looking for for 30 odd years. :)
I also have to show you a photo of my precious boy ready to head off to high school for the first time. Would you say that looks like confidence? He's loving it and every arvo comes home telling me all about his day and the good and bad of it.

Doesn't he look cute?
Anyway, bye for now.
Love,
Janelle
As you can see it's a lovely red colour, has gas lift and is very comfortable to sit in. For those of you who would like one - you can get them from Super AMart and the model name is ...Astra. I've finally found what I've been looking for for 30 odd years. :)
I also have to show you a photo of my precious boy ready to head off to high school for the first time. Would you say that looks like confidence? He's loving it and every arvo comes home telling me all about his day and the good and bad of it.
Doesn't he look cute?
Anyway, bye for now.
Love,
Janelle
Tuesday, February 3, 2015
80th Birthday card
I'm sharing a card I made for my mother-in-law for her 80th birthday last week.

I embossed a panel of white cardstock using a Couture Creations Confetti embossing folder. I then inked over the top with gold Delicata ink. The panel (and the sentiment banner) was matted with gold mirri card. The doily was one I had made previously using paper clay and a mold, which was sprayed with Iridescent Gold Glimmer mist. The font was die cut from gold glitter cardstock using a Tim Holtz Alterations/Sizzix die set (Alphanumeric 3/4" tall).

I embossed a panel of white cardstock using a Couture Creations Confetti embossing folder. I then inked over the top with gold Delicata ink. The panel (and the sentiment banner) was matted with gold mirri card. The doily was one I had made previously using paper clay and a mold, which was sprayed with Iridescent Gold Glimmer mist. The font was die cut from gold glitter cardstock using a Tim Holtz Alterations/Sizzix die set (Alphanumeric 3/4" tall).
I'm sure that this set will become a firm favourite as it produced a really nice result and the letters are a great size to use. Just one thing, since there are 125 pieces in this set and I was sure that I will be using "Happy Birthday" again, I separated these dies out from the heap and sealed them in a little baggie so I don't have to hunt through the lot again. I'm also thinking of doing the same for other words that may be used often, especially "love", etc.
I'm glad to report my MIL loved the card. She is a lovely person and I'm so very lucky that she's in my life. She welcomed me from the very first meeting and she's always there with a hug when needed. :) I am blessed.
Anyway, bye for now.
Love,
Janelle
Friday, January 16, 2015
My son takes after me!!!
I'm proud to display the very first "proper" card my son, Alex, has made. He's going to a birthday party for his "girlfriend" and he wanted to make her a birthday card. So I asked him about colours, embellishments etc he wanted to use and then sat down with him and made a demo card (just to give him an idea of how the pieces go together). I then left him to it! I love what he achieved by himself and also that's it's nothing like mine - so he extended his creativity and went with what he felt. He even then sat down at the computer and created a little rhyme to go inside the card, that we printed off, cut to size and glued in place.

Can you guess which one is his? I love how he's sort-of bracketed the sentiment tag with the flowers and heart rhinestones. :D
That's all for now,
Love,
Janelle
Can you guess which one is his? I love how he's sort-of bracketed the sentiment tag with the flowers and heart rhinestones. :D
That's all for now,
Love,
Janelle
Thursday, January 1, 2015
Happy New Year (and another video tutorial)
Happy New Year to All! I hope you all had a fantastic Christmas and a slightly sober New Year's Eve. :)
I was fortunate enough to have my stepdaughter up for a week over the Christmas break. It was lovely to spend time with her and to have her share in some family activities with Darryl and Alex (as well as all of the rellies over Christmas and Boxing Day). One day we drove up to Maleny (in the hinterland mountain range of the Sunshine Coast) and we had a wonderful lunch at a little vineyard called Flame Hill Vineyard. We had this amazing Charcuterie platter that had various sliced cold meats, pickled vegetables, chicken liver pate, meat terrine and an assortment of relishes/pickles etc and breads. YUM! I was also introduced to two wines Summersalt and Wild Child - DOUBLE YUM!


I'm happy to report that I have finally finished my second video tutorial. This is about a technique called Black Magic which uses white inked stamped images that are then coloured with coloured pencils. If you want to find out more you will have to go to YouTube to see more. Once again, though, I must apologise for being long winded, the tutorial covers two videos - one showing the stamping process (though I also go through stamping and masking techniques) and the other going through the colouring technique and construction of the card. I'm going to have to work through making things more simple. I think it stems back to my time as a teacher when I worked in 30 minute blocks of tuition.
Links to my videos are below:
Black Magic technique (Part 1)
Black Magic technique (Part 2)
I learned this technique for a commission I've just finished for Practical Publishing. It gives a lovely result with the colours against the black cardstock.
I hope you enjoy it.
Bye for now,
Janelle
I was fortunate enough to have my stepdaughter up for a week over the Christmas break. It was lovely to spend time with her and to have her share in some family activities with Darryl and Alex (as well as all of the rellies over Christmas and Boxing Day). One day we drove up to Maleny (in the hinterland mountain range of the Sunshine Coast) and we had a wonderful lunch at a little vineyard called Flame Hill Vineyard. We had this amazing Charcuterie platter that had various sliced cold meats, pickled vegetables, chicken liver pate, meat terrine and an assortment of relishes/pickles etc and breads. YUM! I was also introduced to two wines Summersalt and Wild Child - DOUBLE YUM!
I'm happy to report that I have finally finished my second video tutorial. This is about a technique called Black Magic which uses white inked stamped images that are then coloured with coloured pencils. If you want to find out more you will have to go to YouTube to see more. Once again, though, I must apologise for being long winded, the tutorial covers two videos - one showing the stamping process (though I also go through stamping and masking techniques) and the other going through the colouring technique and construction of the card. I'm going to have to work through making things more simple. I think it stems back to my time as a teacher when I worked in 30 minute blocks of tuition.
Links to my videos are below:
Black Magic technique (Part 1)
Black Magic technique (Part 2)
I learned this technique for a commission I've just finished for Practical Publishing. It gives a lovely result with the colours against the black cardstock.
I hope you enjoy it.
Bye for now,
Janelle
Subscribe to:
Posts (Atom)